How good are your shoulders functioning?
Posted on August 01 2019
This informative guest blog has been penned by our family chiropractor Dr Craig Buscomb from Elevate Chiropractic.
Our shoulders are amazing joints. They have (or at least should have) a vast range of motion. This amount of motion comes at a cost though and that is stability. The shoulder joint doesn’t have a ball in socket type joint like the hip, which is inherently stable. The joint of the shoulder is often referred to as like a golf ball on a tee.
This lack of socket allows the range of motion that our shoulders have, but also means it is more unstable than the hips. It is the muscles and ligaments of the shoulder that keep it in place. In order for the shoulders to function well there needs to be good alignment of the shoulder joint and thoracic spine.
Basically, this means we need to have good posture to allow optimal functioning of the shoulders. In this post I am going show you 2 tests to try to see how your upper back and shoulders are functioning. Continue reading to try the tests.
If we have a rounded upper back from slouching over computers, looking at phones or driving, it can impact how the shoulder can move.
A simple demonstration of this is to slouch and lift your arms up sideways as far as you can go and see how easy it feels. Now sit/stand up straight with shoulders back and down, chest up, chin back and do the same thing. You will probably feel that it is much easier to lift your arms up when you are in ‘good’ posture.
The postural distortions associated with slouching, using computers/phones etc are often referred to as Upper Cross Syndrome (UCS).
UCS is characterized by tightness in the chest and the upper back/neck and weakness in the mid back and the front of the neck, hence the ‘cross’ part of the name. This syndrome can cause several different problems in the body and can lead you to be more prone to injuries.
This muscle imbalance created by UCS can lead to joint dysfunction in the neck, the mid back and the shoulders. It is often associated with common postural changes that we see regularly. These include:
Forward head posture
Increased cervical lordosis (neck curve)
Increased thoracic kyphosis (hunch back type posture)
Elevated and rolled forward shoulders
This syndrome is most often seen in people who sit at a desk for the majority of the day or who commonly exhibit “poor posture”. Apart from these postural changes the effects of this UCS can be wide ranging and can include: Shoulder instability, dysfunction and pain
It can cause mid back tension and pain
Increased risk of rotator cuff injuries
Rib joint dysfunction
Neck pain
Headaches
From what I see in practice, most of the conditions involving the mid to upper back, neck and shoulders are due in some part to this syndrome. So, how do you know if you have Upper Cross Syndrome or shoulder dysfunction? Here are some tests to try.
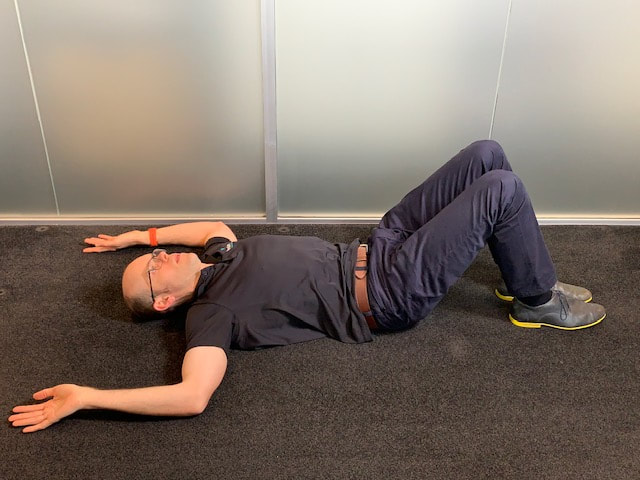
TEST 1: The floor angel
This is a simple test to see if you have UCS. Here is how to do it:Lay on your back on the ground with your legs bent to protect your lower back.
Put your arms into the 90/90 or ‘don’t shot’ position as pictured.
Now simply let them fall back towards the ground and see how far they go.
Ideally in this position you should be able to have your forearms and back of your hands flat on the ground or at most your wrist 1cm off of the ground.
If you have tight muscles and joints in the upper back and chest your hands won’t fall all the way back to the ground.
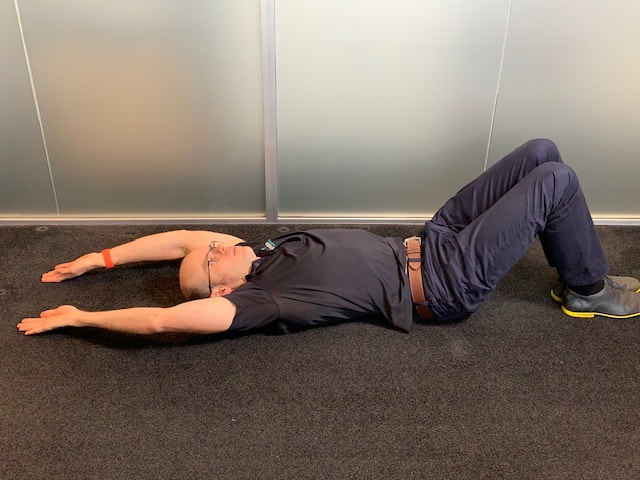
To take this test to the next level, you can try doing it with your arms straight and let them fall all the way back to the ground overhead and see if they can reach the ground then. This will test more shoulder flexion than rotation like the previous version. It is common to do well in one and not the other.
I still have have a little way to go with these tests. You can see the gap under my right wrist is bigger than the left on the floor angel test (this is mainly due to a scoliosis), but I am so much better than I was a few months ago after working hard on improving shoulder range of motion.
NOTE: with this test it is important to make sure your lower back is not lifting off of the ground to allow your hands to go back further. The best bet would be to push your lower back into the ground to help lock down your rib cage so you can isolate your shoulder joints.
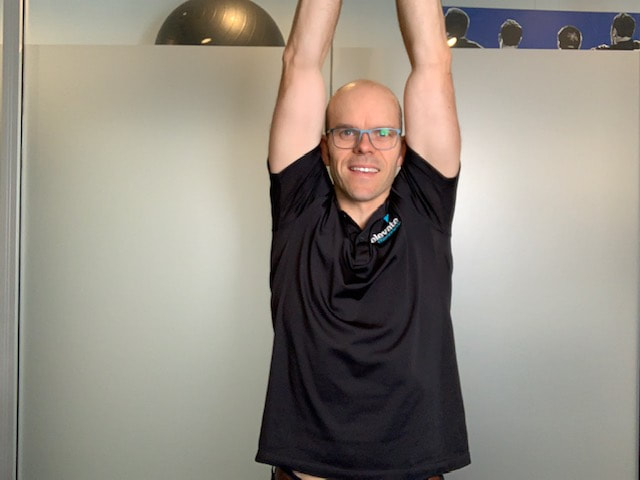
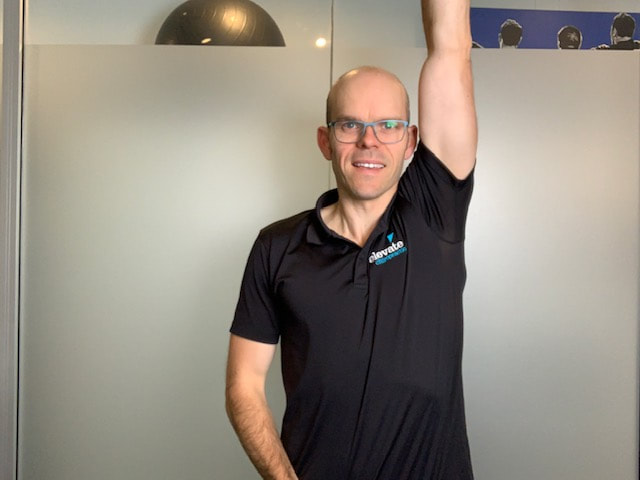
TEST 2: General shoulder range of motion and Appley’s Scratch test
This is another simple test to see how your shoulder range of motion is. Ideally all of these should be pain free.
- Stand in good posture with shoulders back and down, chest up, head back and your core engaged.
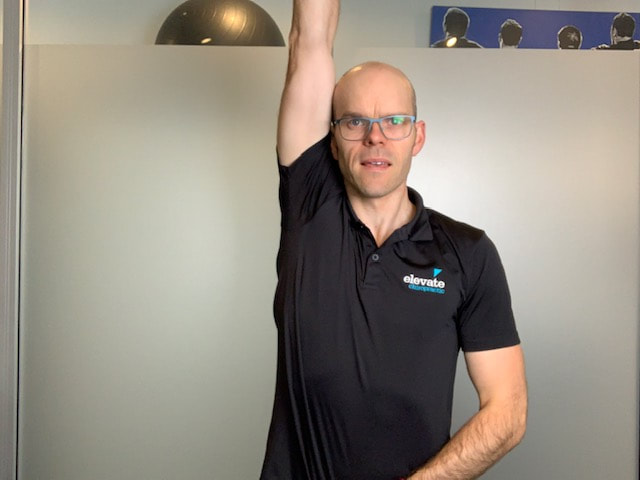
- Shoulder Abduction: simply lift your arm up sideways as high as you can go without moving your upper body. Ideally you should be able to get you upper arm to touch your ear. You can do this individually or with both arms together. (Image: top row below)
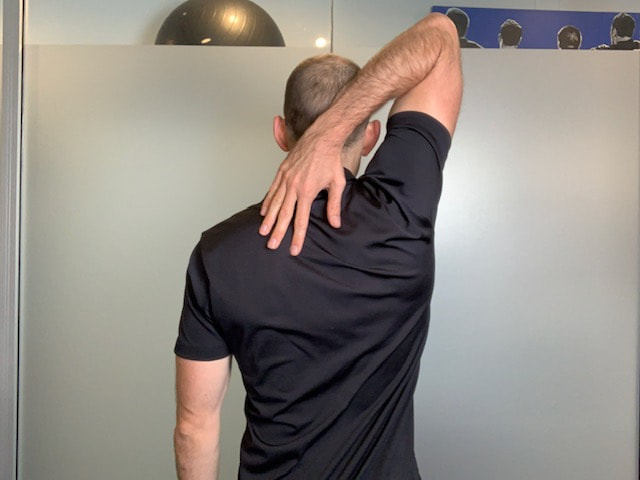
- Appleys Scratch test part 1: when standing in good posture reach with one arm behind your head and see if you can touch the top of your opposite scapula. Compare side to side. You should be able to touch the top of the opposite scapula without pain. (Image: Bottom left)
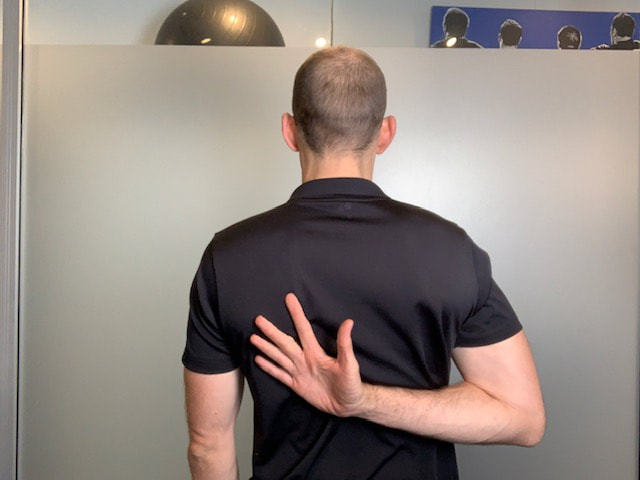
- Appleys Scratch test part 2: When standing in good posture, reach with one arm behind your back and see if you can touch the bottom of the opposite scapula. Compare side to side. You should be able to touch the bottom of the opposite scapula without pain. (Image: Bottom right)
These two simple tests will give you an idea of the motion of your shoulders and see if there are things you need to work on. I would suggest recording your results or take a photo and then you can refer back to it after you have been working on your upper back and shoulder function.
How do you work on it you may ask?
Well, over the coming weeks I am going to be releasing some blog posts and videos showing how you can go about improving the function of the shoulders and upper back. Stay tuned for these.
If you have any questions, please feel free to contact me and I will do my best to answer them for you.
Craig